

Brew Coffee in a Thermos for Long Shifts
Table of Contents
- Why Brewing Coffee in a Thermos Works for Long Shifts
- What You'll Need Before You Start
- Step 1: Preheat Your Thermos
- Step 2: Brew Strong Coffee at the Right Temperature
- Step 3: Fill and Seal Your Thermos Quickly
- How Long Does Coffee Stay Hot in a Thermos
- How to Keep Coffee Hot in a Thermos Throughout Your Shift
- How to Keep Coffee From Getting Bitter in a Thermos
- Frequently Asked Questions
Last Updated: October 7, 2026
Why Brewing Coffee in a Thermos Works for Long Shifts
Keeping coffee hot during a long shift is a real problem, but a brew coffee thermos solves it. You brew a cup at 5 AM, but by noon it's gone cold or tastes stale. A thermos solves this. When you brew coffee directly into an insulated flask, you trap heat at the start.
This is where brewing coffee in a thermos for long shifts beats standard travel mugs. You're not pouring hot coffee into a cold container and losing temperature in the transfer. You're starting with heat already locked in.
The method works because vacuum-insulated flasks are engineered to stop heat loss. There's a layer of air between the inner and outer walls. No air means no convection. No convection means your coffee stays hot for hours. This is the same technology used in laboratory equipment and industrial applications, it's proven physics.
What You'll Need Before You Start
Before you brew, gather your tools. You need the right thermos, the right coffee, and the right water temperature. Skip any of these and your coffee won't stay hot or will taste bitter by mid-shift.
Thermos and Flask Selection
A vacuum-insulated thermos is not optional here. Standard plastic travel mugs hold heat for maybe two hours. A quality vacuum flask keeps coffee hot for eight hours or more.
Look for these features:
- Double-wall vacuum insulation - This is the core technology. No air between walls means minimal heat loss.
- Stainless steel construction - It's durable and doesn't absorb flavors or odors the way plastic does.
- Tight-sealing lid - A loose cap lets steam escape and heat with it. Test the seal before you buy.
- Wide mouth opening - Makes pouring hot water and cleaning easier. Narrow necks slow you down.
- Capacity between 32-40 ounces - Large enough for a full shift, small enough to fit in a work bag or truck.
Avoid cheap thermos bottles. They fail at insulation and leak. Spend the money on a solid one. You'll use it every shift for years.
Coffee and Water Requirements
Use whole beans or freshly ground coffee. Pre-ground coffee loses flavor fast. If you grind at home or at work, do it right before brewing.
For water, use filtered water if possible. Tap water with high mineral content can leave deposits inside your thermos and affect taste over time.
Water temperature matters. You need water between 195 and 203 degrees Fahrenheit. Boiling water at 212 degrees is too hot, it extracts bitterness from the grounds. Water below 195 degrees doesn't extract enough flavor. A simple kitchen thermometer costs a few dollars and takes the guesswork out.
Step 1: Preheat Your Thermos
This step is non-negotiable. A cold thermos will drop your coffee temperature by 10-15 degrees in the first minute. Preheating eliminates that shock.
Pour hot water into your thermos and let it sit for two minutes. Use the same water temperature you'll use for brewing, between 195 and 203 degrees Fahrenheit. After two minutes, empty the thermos completely.
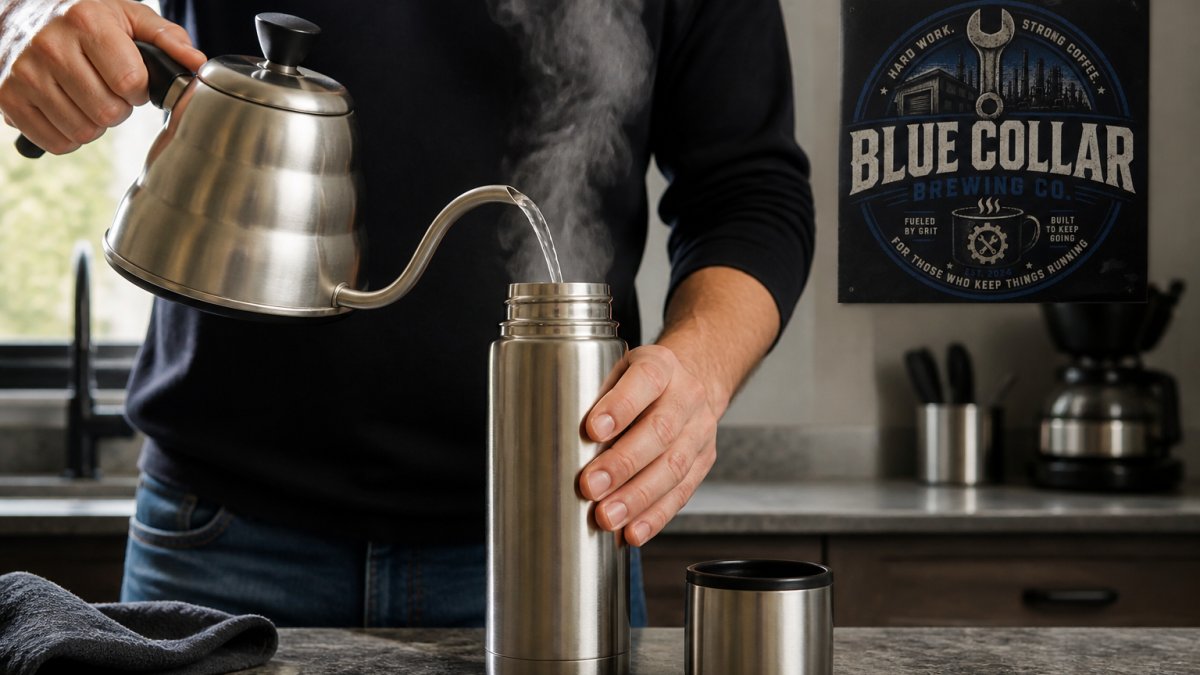
Why this works: The hot water heats the inner walls. When you pour in your brewed coffee seconds later, there's no temperature loss to the container itself.
Time this step right. Preheat your thermos while your water heats. By the time water reaches the right temperature, your flask is ready.
Step 2: Brew Strong Coffee at the Right Temperature
Brew strength matters more than you think. When coffee sits hot for hours, it oxidizes. The flavor flattens. If you start with weak coffee, it tastes like hot water by lunchtime. Start with strong coffee and it stays interesting.
Coffee-to-Water Ratio for Thermos Brewing
When you brew coffee thermos-style, use more coffee than you would for a standard cup. A standard ratio is one part coffee to 16 parts water by weight. For a thermos brew that will sit for hours, use one part coffee to 12 parts water.
Here's what that looks like in practice:
- For a 32-ounce thermos: Use 2.5 ounces of coffee (about 70 grams) and 30 ounces of water
- For a 40-ounce thermos: Use 3.3 ounces of coffee (about 95 grams) and 38 ounces of water
Measure by weight if you have a scale. If not, use this rough guide: one ounce of whole beans is about a quarter cup. Grind just before brewing.
The stronger start protects flavor over time. This is especially true if you're drinking the coffee six, seven, or eight hours after brewing.
Choosing Your Brew Method
You have three practical options for brewing into a thermos: pour-over, French press, or batch brewing in a pot.
Pour-over method takes 3-4 minutes. Place a filter cone over your thermos mouth. Pour grounds into the filter. Slowly pour hot water through. The coffee drips directly into your flask.
French press method takes 4-5 minutes. Brew in the press, then pour into your preheated thermos. This works well if you're brewing for multiple people or need a larger batch.
Batch brewing in a pot takes 5-10 minutes depending on method. Brew in a saucepan or stovetop moka pot, then pour into your thermos. This is best if you're filling multiple thermoses for a crew.
All three methods work. Pick the one that fits your morning routine. The key is using hot water in the 195-203 degree range and pouring directly into a preheated thermos.
Step 3: Fill and Seal Your Thermos Quickly
Speed matters here. From the moment you pour brewed coffee into your thermos to the moment you seal the lid should be less than 30 seconds.
Fill your thermos to about two-thirds full. Leaving some headspace prevents pressure buildup and makes the lid easier to seal. A completely full thermos can be hard to cap and may leak when pressure changes.
Wipe the rim dry with a clean cloth. Any liquid on the seal breaks the air-tight connection. Screw the lid on firmly. You should hear or feel a slight resistance.
Test the seal by turning the thermos upside down over a sink for five seconds. No drips means you're good. If liquid comes out, unseal and try again.
This is the moment most leaks happen, a rushed seal or a gasket with coffee residue on it. Take ten extra seconds to get it right.
How Long Does Coffee Stay Hot in a Thermos
A quality vacuum-insulated thermos keeps coffee hot for 6-8 hours. Some premium models claim 12 hours, but real-world performance depends on starting temperature and ambient conditions.
Here's what you can expect:
- First 2 hours: Coffee stays at 185-190 degrees Fahrenheit. Still hot enough to drink comfortably.
- Hours 2-4: Temperature drops to 170-180 degrees. Still warm and drinkable. Flavor is holding up.
- Hours 4-6: Temperature is 155-170 degrees. Warm but not hot. This is where most people stop drinking.
- Hours 6-8: Temperature is below 150 degrees. Barely warm. Coffee is drinkable but no longer hot.
The exact timeline depends on how full your thermos is, how cold it is outside, and how often you open the lid. Every time you open the cap, you release heat. Opening it five times in the first hour costs you 10-15 degrees.
For a typical 10-12 hour shift, your coffee will be hot for the first six hours and warm for the rest. Plan your coffee consumption around this reality. Drink more in the morning when it's hot.
How to Keep Coffee Hot in a Thermos Throughout Your Shift
Keeping coffee hot isn't just about the thermos. Your brewing method, water temperature, and how you handle the flask all matter.
Start with the strongest coffee you're comfortable drinking. Weak coffee tastes worse the longer it sits. Strong coffee stays interesting even as it cools slightly.
Use water between 200-203 degrees Fahrenheit. This is hot enough to extract full flavor but not so hot it pulls bitterness from the grounds.
Keep your thermos sealed between drinks. Every time you open the lid, you lose heat.
Store the thermos in an insulated bag or wrap it in a towel if you're working in very cold conditions. External cold speeds up heat loss.
Avoid metal travel mugs without insulation. Transferring hot coffee from your thermos into an uninsulated metal cup wastes the whole advantage.
How to Keep Coffee From Getting Bitter in a Thermos
Bitterness is the biggest complaint about coffee that's been sitting hot for hours. The longer coffee sits, the more it oxidizes. Oxidation tastes harsh and flat.
Start with fresh-roasted beans. Coffee roasted more than two weeks ago has already begun losing volatile aromatics. When those aromatics are gone, bitterness is all that's left.
Brew strong but not too hot. Water over 205 degrees pulls tannins and over-extracts the grounds. This creates bitterness from the start.
Use a coarser grind if you're brewing into the thermos directly. Finer grounds over-extract faster, especially in a hot thermos where contact time is long.
Avoid leaving grounds in contact with hot water for more than five minutes.
| Brewing Step | Action | Timing |
|---|---|---|
| Preheat thermos | Pour hot water, wait, empty | 2 minutes |
| Heat water | Bring to 200-203°F | 5-10 minutes |
| Brew coffee | Pour-over, French press, or pot method | 3-5 minutes |
| Fill and seal | Pour into thermos, wipe rim, cap tightly | Less than 30 seconds |
| Total preparation time | From start to sealed thermos | 12-20 minutes |
The quality of your coffee matters most. Fresh beans, proper temperature, and the right ratio beat any trick or technique.
Keeping coffee hot through a long shift comes down to the thermos, the brew method, and the coffee itself. Blue Collar Brewing's carefully sourced beans, roasted to order for peak freshness, ensure your thermos coffee stays flavorful for hours. Shop Coffee and experience the difference fresh-roasted beans make when you're counting on your coffee to fuel a full day of work.

Frequently Asked Questions
Should you preheat a thermos before adding coffee?
Yes. Preheating reduces heat loss when you pour in hot coffee. Fill your thermos with hot water for 2-3 minutes, then empty it before adding your brewed coffee. A preheated thermos can keep coffee hot for several additional hours compared to a cold one. This simple step is one of the most effective ways to extend how long coffee stays hot in a thermos.
What coffee-to-water ratio should I use for thermos brewing?
Use a 1:16 ratio of coffee to water for standard strength, or 1:14 for stronger coffee suited to long shifts. For a 32-ounce thermos, use 2 ounces of ground coffee with 32 ounces of water. A stronger brew concentrates flavor and resists becoming flat or bitter as it sits. Adjust based on your grind size and brew method, finer grinds extract faster and may need less coffee.
How long can coffee safely sit in a thermos?
Coffee remains safe to drink for up to 12 hours in a properly sealed thermos, though flavor and freshness peak within the first 4-6 hours. After 8-10 hours, taste noticeably degrades and bitterness increases. For a long shift, aim to finish your thermos within 6-8 hours for the best experience.
What's the best coffee for keeping hot in a thermos all day?
Choose a medium roast blend with higher caffeine content, like Blue Collar Brewing's Breakfast Blend or Max Caf Blend. These blends are designed to stay smooth and flavorful even after hours in a thermos. Avoid light roasts, which become thin and sour when held hot for extended periods. Brew stronger than usual, the extra concentration helps maintain flavor as the coffee cools and sits.