

How to Use a Moka Pot on a Camping Stove
Table of Contents
- Equipment You'll Need for Camping Coffee
- Choosing the Right Camping Stove for Your Moka Pot
- Moka Pot Heat Management on a Portable Stove
- Step-by-Step Brewing Process with Your Moka Pot
- High Caffeine Coffee for Night Shifts
- How to Clean a Moka Pot in the Wild
- Stability Hacks and Wind Protection
- Common Mistakes to Avoid
- Frequently Asked Questions
Last Updated: September 29, 2026
Equipment You'll Need for Camping Coffee
Learning how to use a moka pot on a camping stove requires the right gear. A moka pot is a three-chamber aluminum or stainless steel device that forces hot water through ground coffee under pressure. You'll also need a portable camping stove, either a canister stove or liquid fuel model, depending on your setup.
Here's what to gather before you head out:
- Moka pot (3-cup, 6-cup, or 9-cup size)
- Portable camping stove with stable pot support
- Lighter or matches
- Fresh water source or pre-filled container
- Coffee beans (freshly roasted for best results)
- Grinder or pre-ground coffee
- Windscreen or wind protection
- Small cloth or glove for handling the hot pot
The moka pot's gasket and safety valve are critical components. Check them before each trip. A worn gasket leaks steam and water. A stuck safety valve creates dangerous pressure buildup.
Blue Collar Brewing's fresh-roasted blends work exceptionally well in a moka pot. The Cowboy Blend pairs cocoa, caramel, and vanilla tones with the extraction method's natural intensity. For darker preferences, the Italian Roast delivers bold flavor in the field.

Choosing the Right Camping Stove for Your Moka Pot
Not all camping stoves work equally well with a moka pot. The pot needs a stable, level surface and consistent heat. A wobbly stove or uneven flame makes brewing difficult and dangerous.
Canister stoves are lightweight and compact. They burn liquid fuel efficiently and provide steady flame control. However, they can be unstable with a moka pot's weight. You'll need a pot support ring or platform to keep the pot level.
Liquid fuel stoves offer more power and better stability. They work well in cold weather when canister fuel becomes unreliable. The downside: they're heavier and more complex to operate.
Consider these factors when choosing:
- Stability: Does the stove hold a moka pot firmly without tipping?
- Flame control: Can you adjust heat from high to low for simmering?
- Fuel efficiency: How long does one fuel cartridge or tank last?
- Wind resistance: Does the stove perform in breezy conditions?
A windscreen is essential for any camping stove. Wind cools the pot and wastes fuel. A simple aluminum windscreen wrapped around the stove can improve efficiency by 20-30% in typical field conditions.
Moka Pot Heat Management on a Portable Stove
Heat management separates good camping coffee from burnt, bitter coffee. A moka pot requires medium to medium-high heat initially, then medium-low heat once water enters the lower chamber.
Start with high heat to build pressure quickly. Once you hear a gentle hissing sound, reduce the flame to medium. This prevents the safety valve from releasing too much steam and allows proper extraction.
The brewing process typically takes 5-8 minutes on a camping stove, depending on the pot size and fuel type. Watch for a steady flow of coffee into the upper chamber. If coffee spurts violently, the heat is too high. If it drips slowly, increase the heat slightly.
Thermal conductivity matters here. Aluminum moka pots heat faster but cool faster. Stainless steel pots distribute heat more evenly but take longer to warm up. For camping, aluminum is usually preferable because you control the brewing time more precisely.
Water temperature affects extraction quality. Cold water takes longer to reach boiling point, especially at altitude. Pre-heating water in a separate pot saves time and fuel. Boiling water poured into the lower chamber cuts brewing time by 1-2 minutes.
Step-by-Step Brewing Process with Your Moka Pot
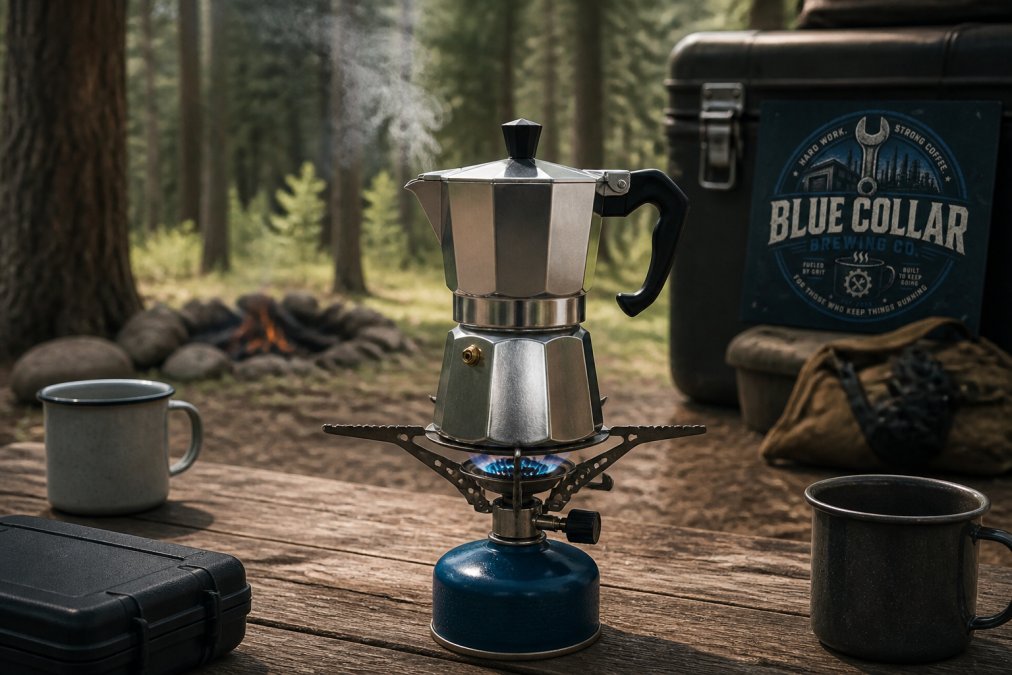
Understanding how to use a moka pot on a camping stove follows a simple sequence. Master these steps and you'll produce excellent coffee every time.
Step 1: Prepare the lower chamber. Fill the lower chamber with cold water just below the safety valve. The water level is critical, too much creates excessive pressure, too little leaves grounds dry.
Step 2: Add ground coffee to the filter basket. Use medium-fine grind coffee. Fill the basket level with the rim but don't tamp hard. A light, even distribution works best. Tamping too firmly restricts water flow and creates over-extraction.
Step 3: Screw the upper chamber onto the lower chamber. Make sure the gasket sits properly in the lower chamber. Hand-tighten only, over-tightening damages the gasket and makes disassembly difficult in the field.
Step 4: Place on the stove at medium-high heat. Position the pot on the stove's pot support. Ensure it sits level and stable. Turn on the flame.
Step 5: Listen for the hiss. After 2-3 minutes, you'll hear a gentle hissing sound as pressure builds. This signals water is starting to flow through the grounds. Reduce heat to medium-low immediately.
Step 6: Watch for the flow. Coffee should flow steadily into the upper chamber, not violently spurt. A steady trickle means extraction is happening correctly. This phase lasts 3-5 minutes depending on pot size.
Step 7: Remove from heat when you hear a gurgling sound. This indicates most water has passed through the grounds. The gurgling means air is entering the lower chamber. Remove the pot from the stove immediately to avoid burnt coffee.
Step 8: Pour and enjoy. Let the pot cool for 30 seconds before pouring. The coffee is ready to drink straight from the pot.
Water-to-Coffee Ratios for Outdoor Brewing
Getting the ratio right makes the difference between mediocre and excellent camping coffee. The standard ratio is one part coffee to two parts water by weight. For a 6-cup moka pot, this means roughly 18-20 grams of coffee and 36-40 grams of water.
Without a scale in the field, use volume as a guide. Fill the filter basket level with coffee.
Grind Size and Tamping in the Field
Grind size controls extraction speed. Medium-fine grind is the standard for moka pots. Too coarse and water rushes through without extracting flavor. Too fine and water struggles to flow, creating excessive pressure.
Managing Pressure and the Safety Valve
The safety valve is your moka pot's pressure relief system. It opens when internal pressure exceeds safe limits, releasing steam and preventing explosions. Never cover or block the safety valve. Always keep it clean and unobstructed.
High Caffeine Coffee for Night Shifts
Construction crews, logistics professionals, and maintenance teams often work night shifts. High caffeine coffee provides sustained energy without the crash of energy drinks.
How to Clean a Moka Pot in the Wild
Cleaning a moka pot in the field is straightforward but important. Residual coffee oils and grounds can affect flavor over time and create buildup in the safety valve.
Stability Hacks and Wind Protection
A wobbly moka pot on a camping stove is a recipe for disaster. Spilled hot coffee causes burns. Wasted coffee wastes fuel and time. Stability is non-negotiable.
Common Mistakes to Avoid
Mistake 1: Filling the lower chamber above the safety valve. This creates excessive pressure and risks the pot rupturing. Fill to just below the valve every time.
Frequently Asked Questions
Can I use a moka pot while camping, and if so, how?
Yes, you can brew with a moka pot on a camping stove, but it requires attention to heat control and stability. Fill the bottom chamber with water, add finely ground coffee to the filter basket, screw on the upper chamber, and place the pot on a stable, low-to-medium flame. The pressure inside builds as water heats, forcing brewed coffee into the upper chamber. Watch for a hissing sound, that signals the brew is nearly complete. For best results, use a windscreen to protect the flame and stabilize the pot with a pot support or rock formation to prevent tipping.
What water-to-coffee ratio should I use in my moka pot?
A standard ratio is 1 part ground coffee to 2 parts water by weight, though this varies by preference. For a 3-cup moka pot, fill the bottom chamber with about 5 ounces of water and use roughly 2.5 ounces of medium-fine ground coffee in the filter basket. Adjust based on your taste, use slightly less water for stronger extraction and more water for a lighter body. At higher altitudes, water boils at a lower temperature, so you may need to increase brewing time slightly.
How do I keep my moka pot stable on a small camping stove?
Stability is critical to prevent accidents with pressurized vessels. Use a pot support or trivet designed for camping stoves to elevate and center the pot over the flame. If you don't have a support, stack flat rocks in a stable formation to create a platform. Ensure the stove itself sits on level ground and won't shift. A windscreen around the stove helps protect the flame and reduces heat loss, which also improves stability by allowing more consistent flame control. Never leave a brewing moka pot unattended.
What grind size works best for moka pot camping coffee?
Use a medium-fine grind, finer than drip coffee but not as fine as espresso. This size allows proper extraction and pressure buildup without grounds passing through the filter basket into your cup. Tamp the grounds lightly but firmly into the basket, compression helps the water extract flavor and build the pressure needed for the brewing process. In the field, if you only have a coarser grind available, brew slightly longer by keeping the heat on a bit longer after you hear the first hissing sounds.
Getting great coffee on a camping stove requires attention to heat, stability, and technique. A moka pot delivers bold, rich flavor when you respect its pressure system and manage temperature carefully. Blue Collar Brewing's fresh-roasted blends are designed for those who demand premium coffee in any setting. Shop our collection of dark and medium roasts, each roasted to order for maximum flavor and aroma. Your morning shift deserves better than instant or stale gas station coffee.